
 After looking at the picture, my first thought was to make it out of paper mache, supported by a wire structure. Given that we had less than a day to make this we needed something faster. I remembered I had saved the liners to some recessed lights I replaced during a recent home improvement project. The shapes certainly looked like something I could make use of, so I saved them. The hole in the top proved a bit of a problem, but I fixed that by supergluing some strips of plastic from a blisterpack to finish the dome shape.


 The next step was to get paper mache to stick to the metal surface. So I had the girls start ripping up scrap newspaper into strips, which would be the layers of birchwood bark. I then took some of them and superglued them directly to the metal dome. This allowed the other layers to adhere to the paper surface as we wrapped it. Then I mixed up a mixture of white glue and water. Macee was a bit shocked when I told her she had to dip her hands in it to soak the strips of paper. But she did it like a trooper and soaked the strips and applied them in layers around the dome. Then giving it some generous coats of white glue.
 The soaked paper proved to be a problem with our limited time, as we needed to get this thing painted.We were able to quickly resolve this with the use of a hair dryer.
 So I spray painted this with some off-white primer that looked pretty good for a base color for birch bark. While this was drying we went on to work on the base. Macee's mom had provided us with a number of Woodland Scenics products to work on the terrain. One of which included their grass sheets. Using a sheet of MDF board I had cut into the size of the base, I then instructed Macee to scribe and cut a the sheet to match the base.
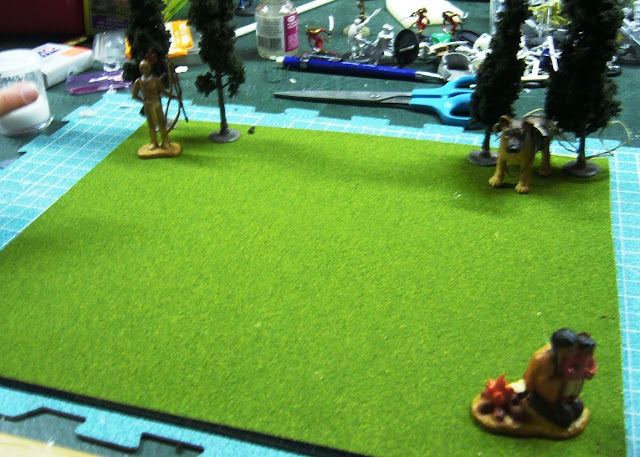

We then layed out the composition on the base the way she wanted it using the figures and trees provided in the Woodland Scenices kit. Adding some glue and some of the terrain material to make the ground look a little more broken and natural. We also had Macee's sister and another friend join in so everyone wanted to start pouring sand, rocks and grass all over this.


In the meantime, Sydney taught her friends how to flock the bases of the figures.


 My wife came up with a good idea for the branches used to support the outside structure. She had some dried up flower stems from the flower garden. Colors, shape and texture were perfect and required no painting. I had Macee cutting these into small stick to glue all over the lodge. For speed we simply painted the opening black.
 The lodge, trees and figures were then glue to the base to complete the diorama.

A week later I was told not only did Macee get an A+ on her project, but she was also awarded the Best in School. I was also presented with a nice gift and a thankyou from her and her parents.

No comments:
Post a Comment